Rankins Dragon Care Sheet

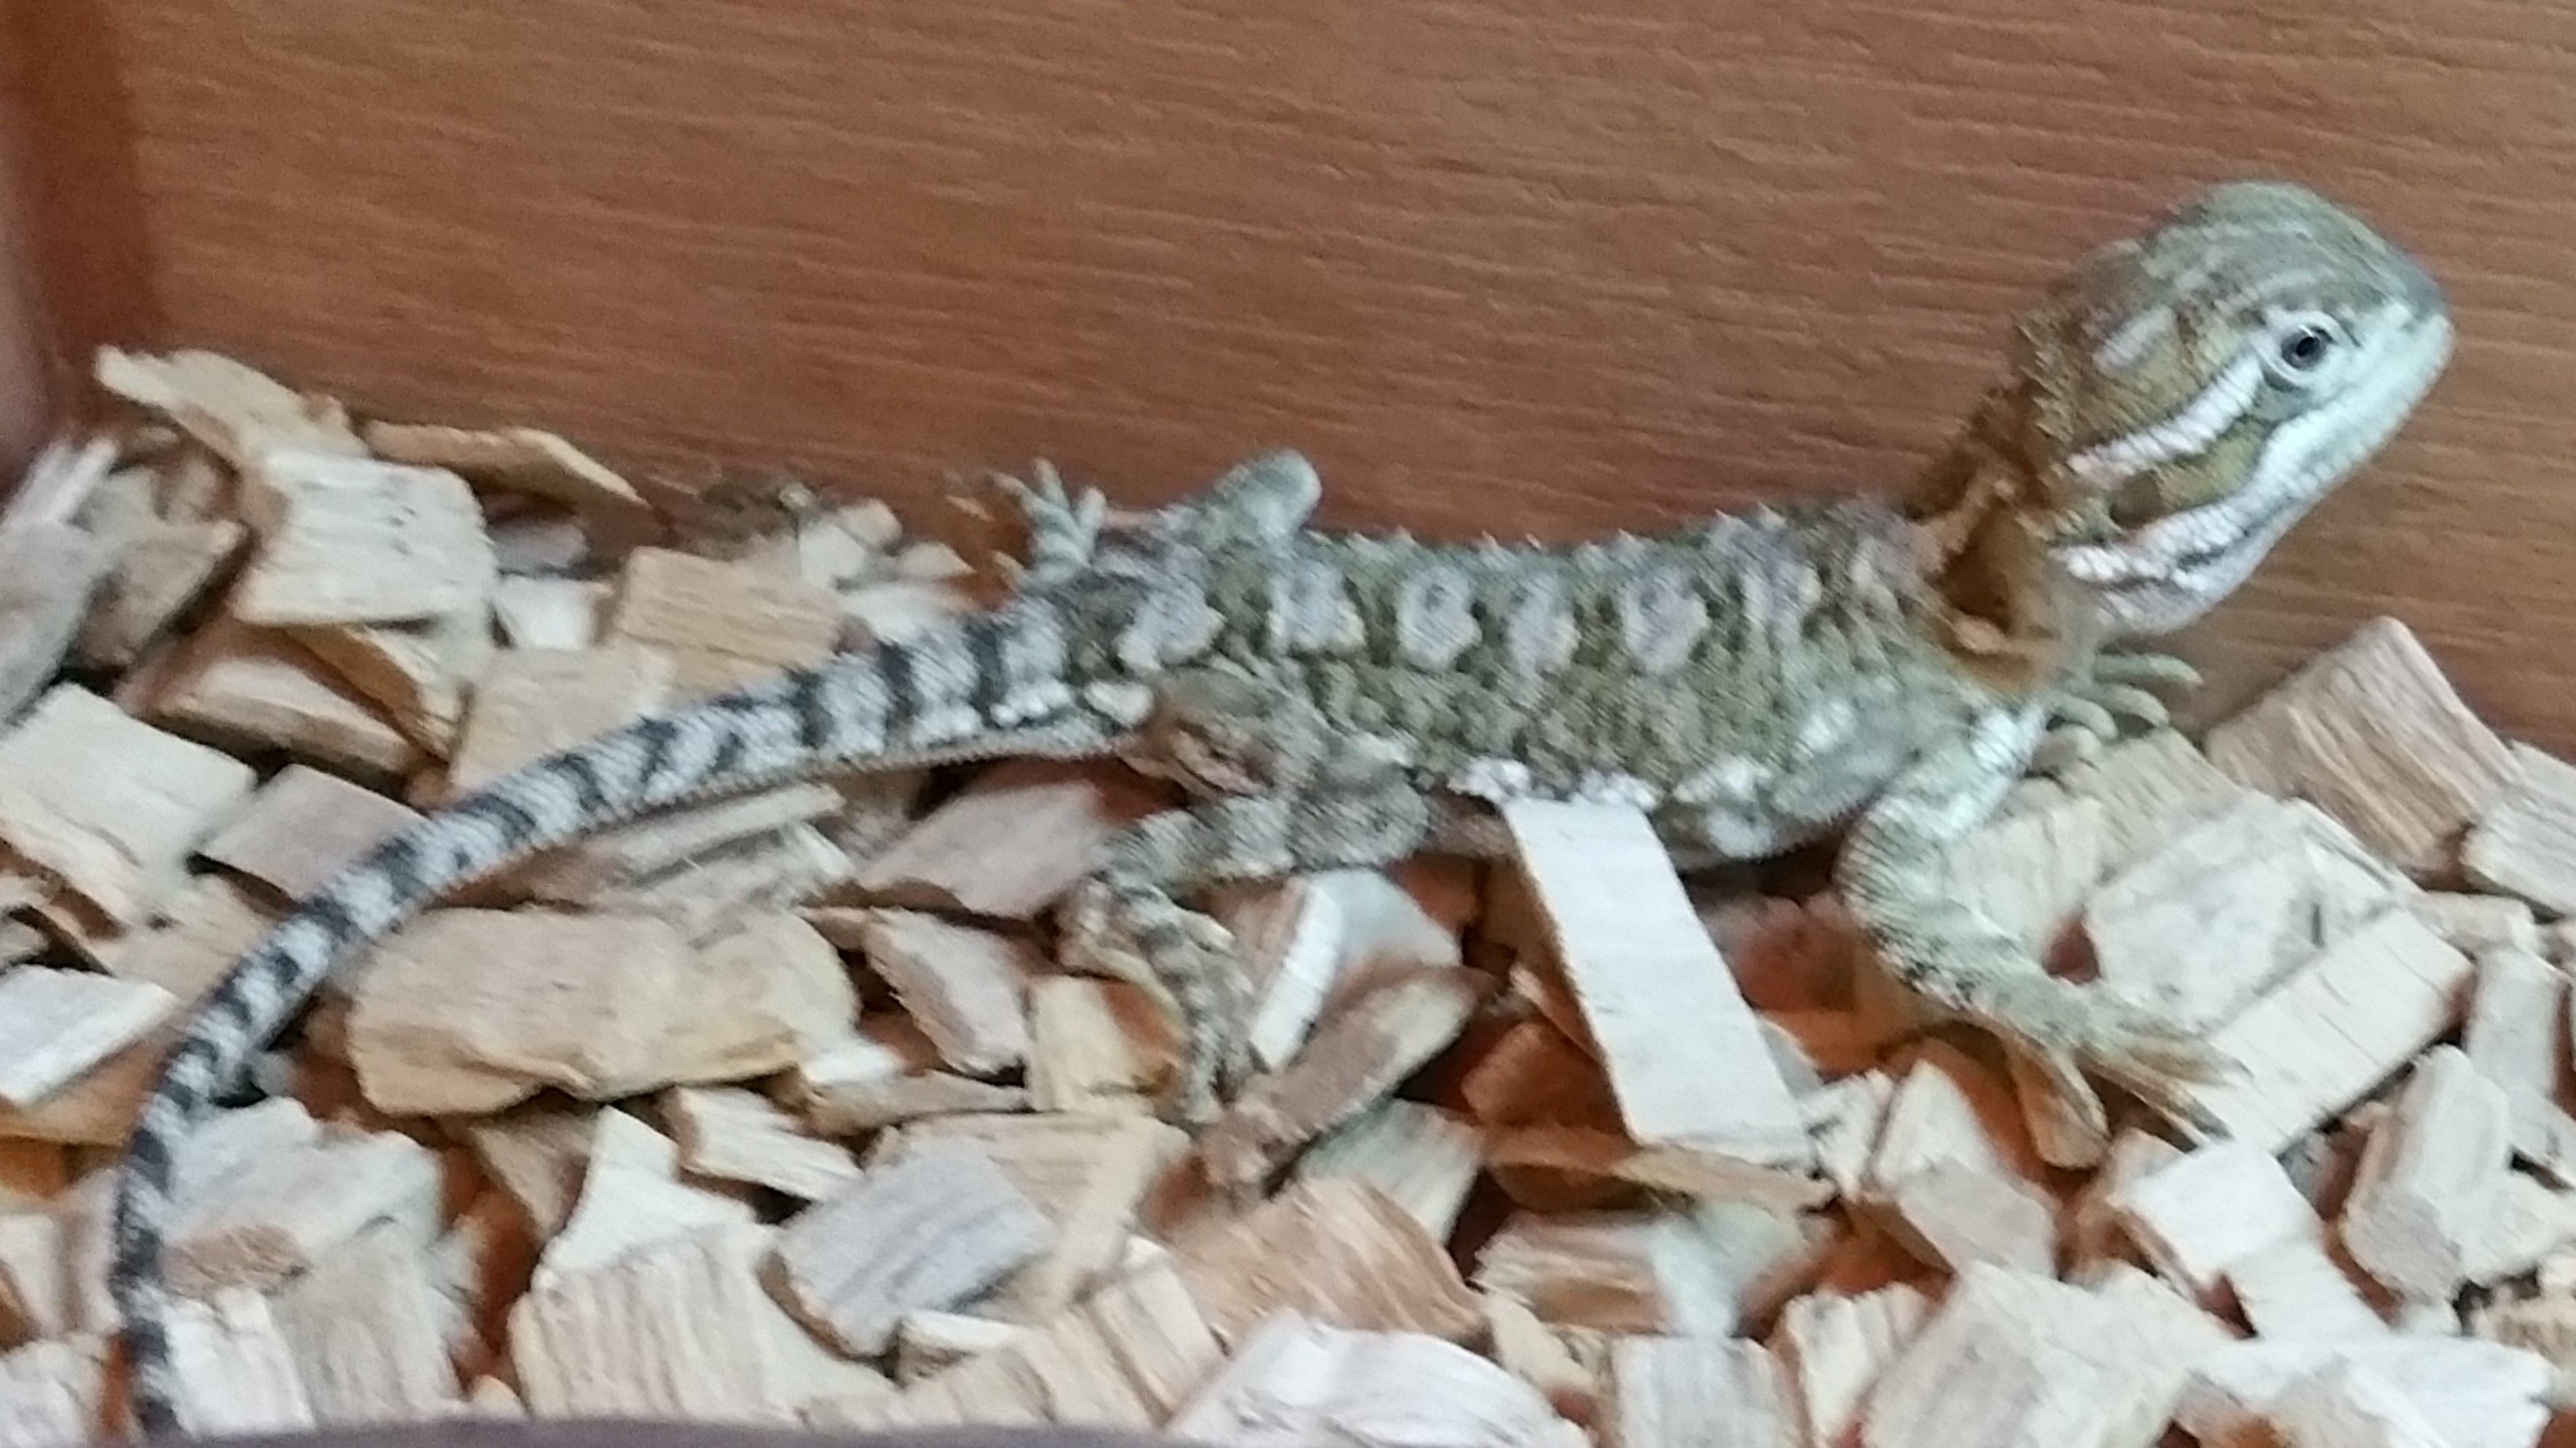
The Rankins dragon is the smaller cousin of the bearded dragon. For those who want to own a beardie but don’t have the space requirements, the Rankins dragon could be the one for you.

rankins

Generally a Rankins dragon requires a smaller vivarium than a bearded dragon as an adult. I would recommend 30” as around the size for one adult although 36” would be better for more dragons. A very young Rankins dragon can at least look a bit lost in a large viv. though and some do seem (at least at first) to get a bit nervous in a large viv. (they will hide away a lot, sometimes to the point of not getting enough UV light) so starting off in a smaller viv is definitely OK, although by no means essential.

If you wish to keep more than a single Rankins dragon (and they seem to be more sociable than beardies) then ensure you only have one male, with a couple of females. Obviously you  will need a bigger enclosure. If you wish to have more than one male Rankins dragon a much larger space is required and it is not recommended.

Rankins dragon heating

A Rankins dragon requires a good temperature gradient (a “hot end “and a “cold end”) to enable them to regulate their body temperature with the hot spot at the hot end at 35-40 C and the cool end around 25 C (so you are going to need two thermometers). There are a lot of opinions out there on heating a Rankins dragon viv. and I’ll not get into it all here. I use a heat mat combined with a basking lamp (sized to the viv.) to create a hot spot. I have mounted mats on the side and on the bottom of the viv. with equal success. I have seen comments saying never use a heat mat and cannot agree. I have never had a problem, ever and this is over a number of years with a large number of animals. That said, there are alternatives and they are fine too (with the exception of “heat rocks” – they really are a bad idea, if you bought a Rankins dragon starter set up from a certain well known pet supermarket you will have one of these, please throw it away to avoid any risk).

A thermostat will help avoid over temperature. A Rankins dragon can tolerate lower temperatures (i.e. if your spot lamp blows) for quite some time but will suffer quite quickly from over temperature. Even with a thermostat you should always check your thermometers at least daily – thermostats can fail.

Rankins dragon lighting

A Rankins dragon needs relatively high levels of UVB light to manufacture vitamin D3, enabling them to assimilate calcium. You will need a 10-12% UVB lamp on 12 – 14 hours a day. Remember UV light does not travel too far from these lamps so make sure they are not too far from where your dragon likes to bask. I don’t use hides with dragons, sometimes they can spend too much time under it and not get enough UV – not common but best avoided.

A basking lamp will give a bright “hot spot” for a Rankins dragon to bask in when it wants to heat up. Obviously the lamp needs to be a proper basking spot, energy efficient lamps are efficient because they do not give out wasted energy as heat, which is what you want.

Rankins dragon substrates.

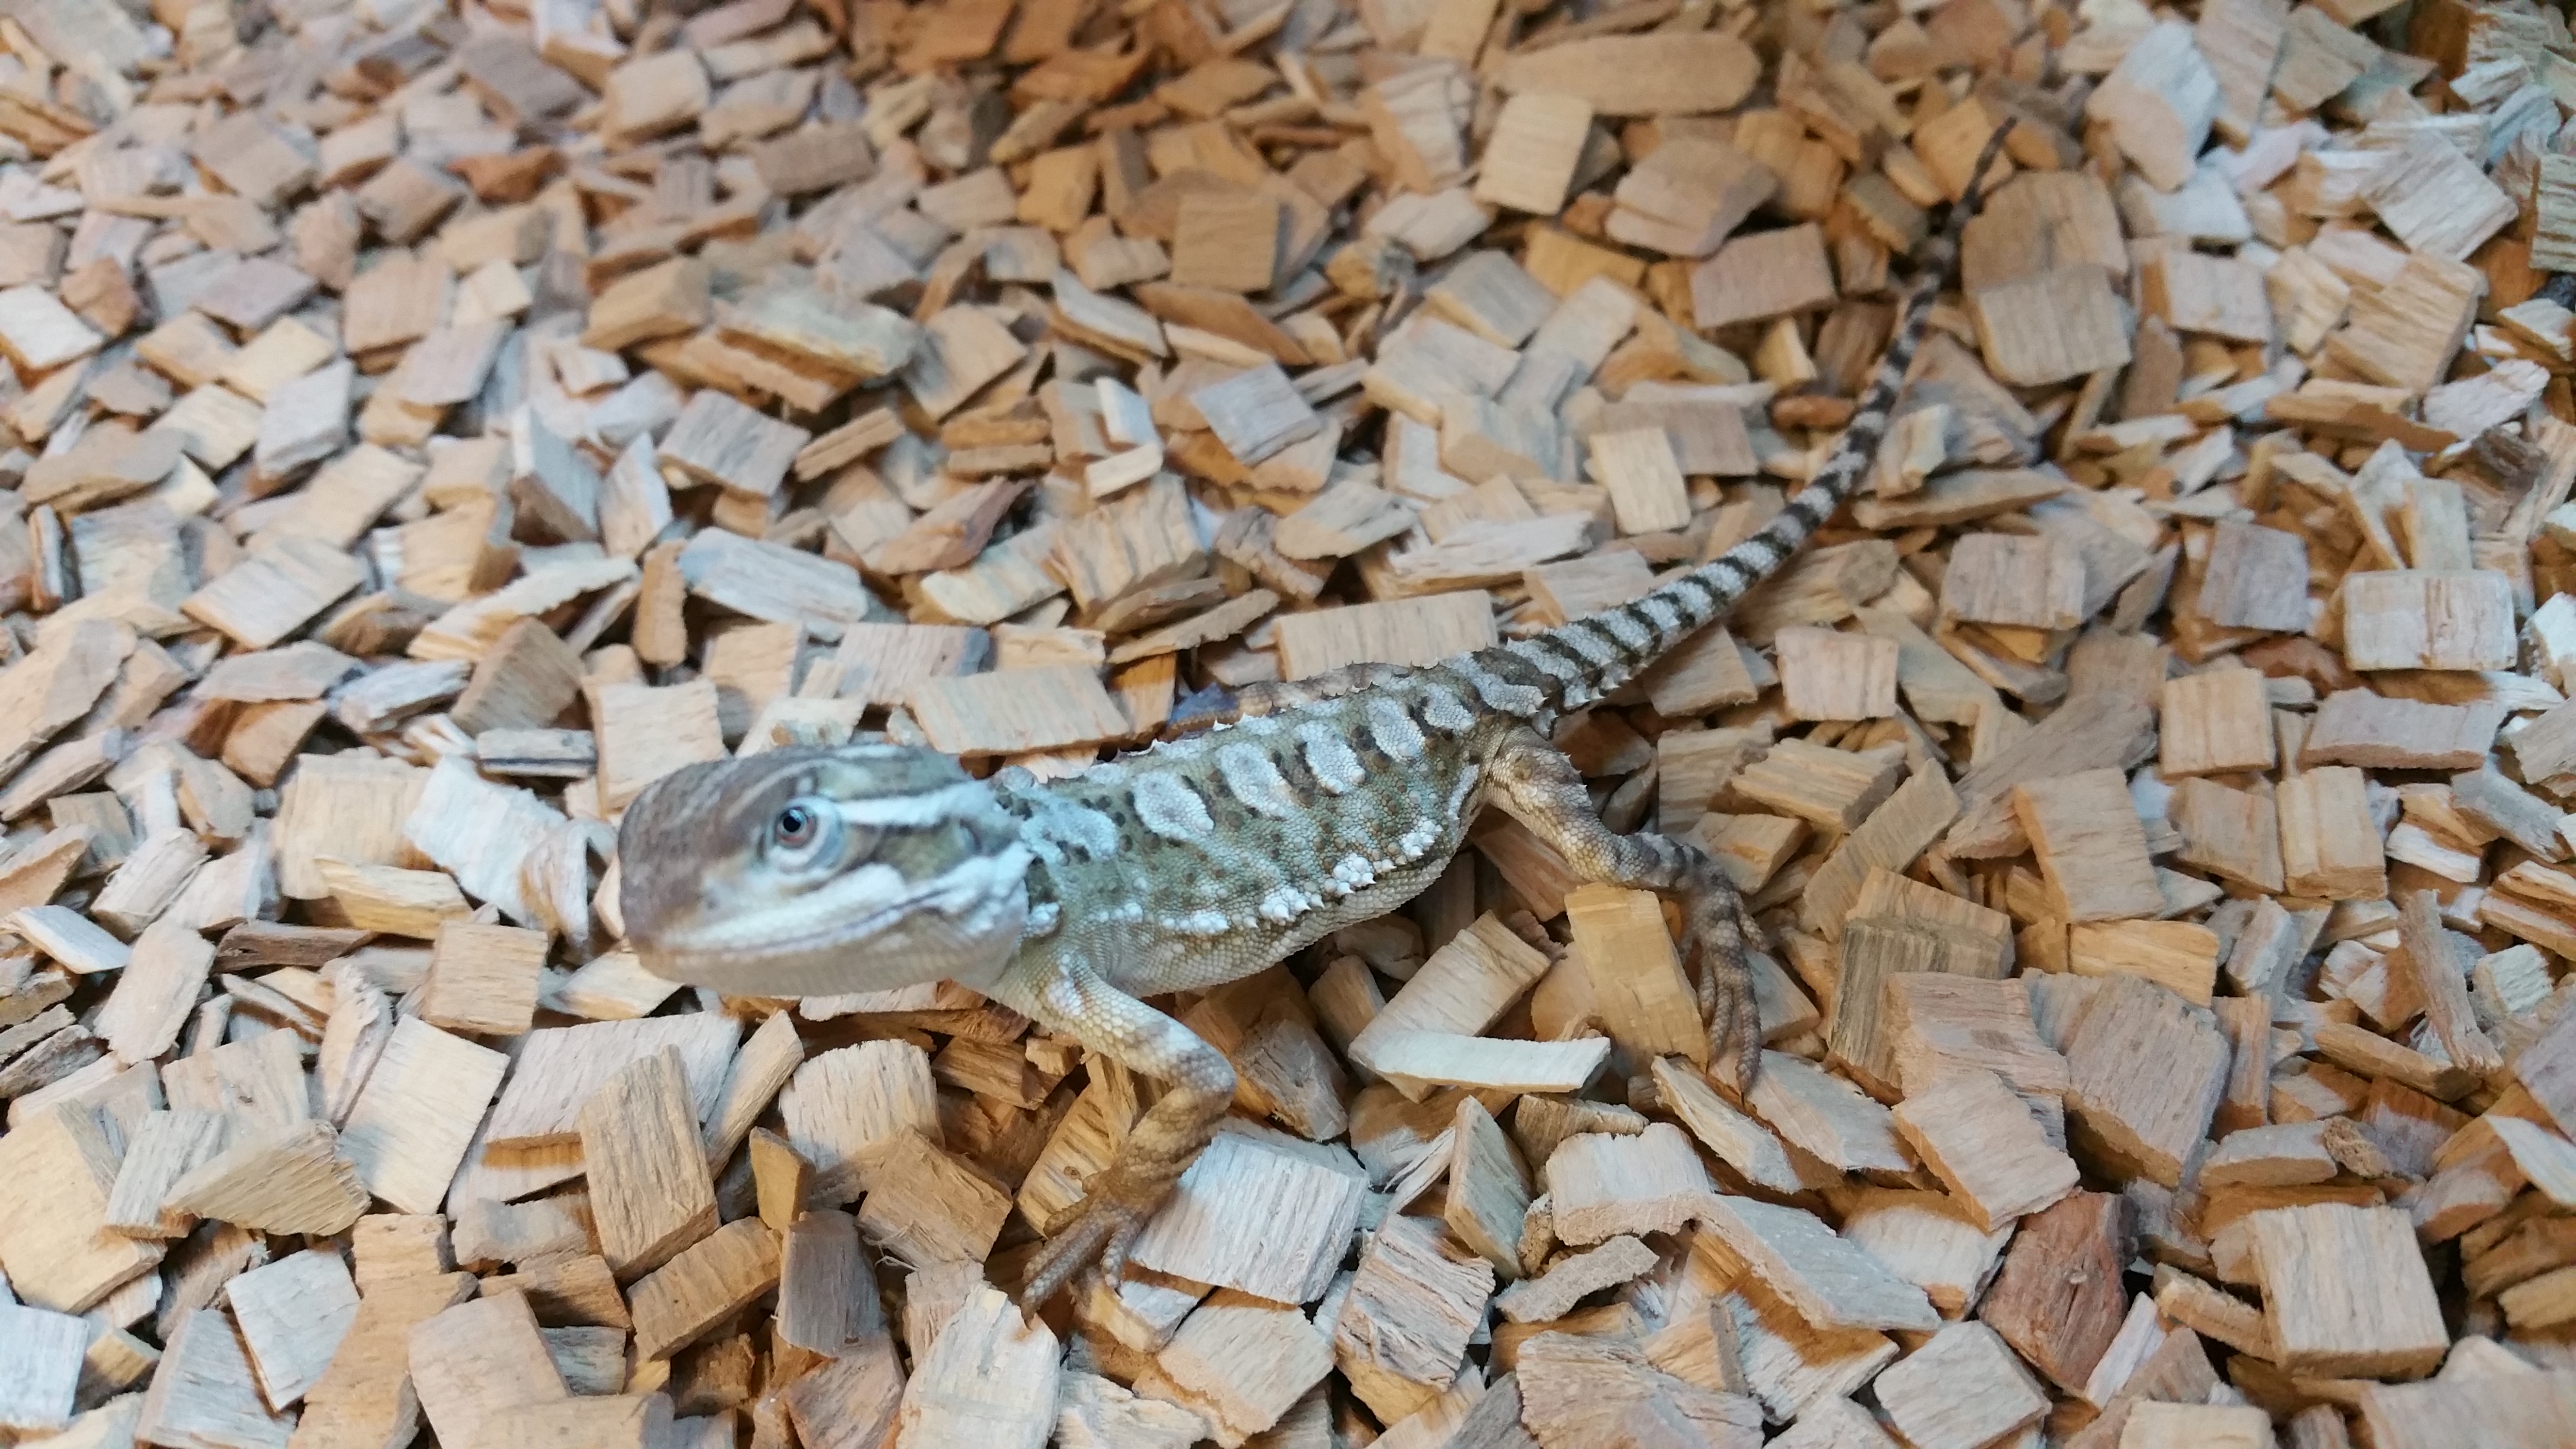
Substrate (what your Rankins dragon lives on) is probably the most controversial subject in the hobby. I am not going to tell you what not to use, there is not a substrate currently in use that can’t cause problems. I use beech wood chips (the coarser variety so it cannot fit in the Rankins dragon mouth when small) or desert bedding in the main, although I have used others. I have never had any issues with impaction with a Rankins dragon so I can’t comment on what is worst for this. However I avoid calci sand, as calcium is an essential nutrient for a Rankins dragon, so they will eat as if they feel they need it – why tempt fate? Also, most of my vivs. are front opening,  with sliding glass and the sound of sand in the runners makes me cringe!

rankins dragon

Rankins dragon decor

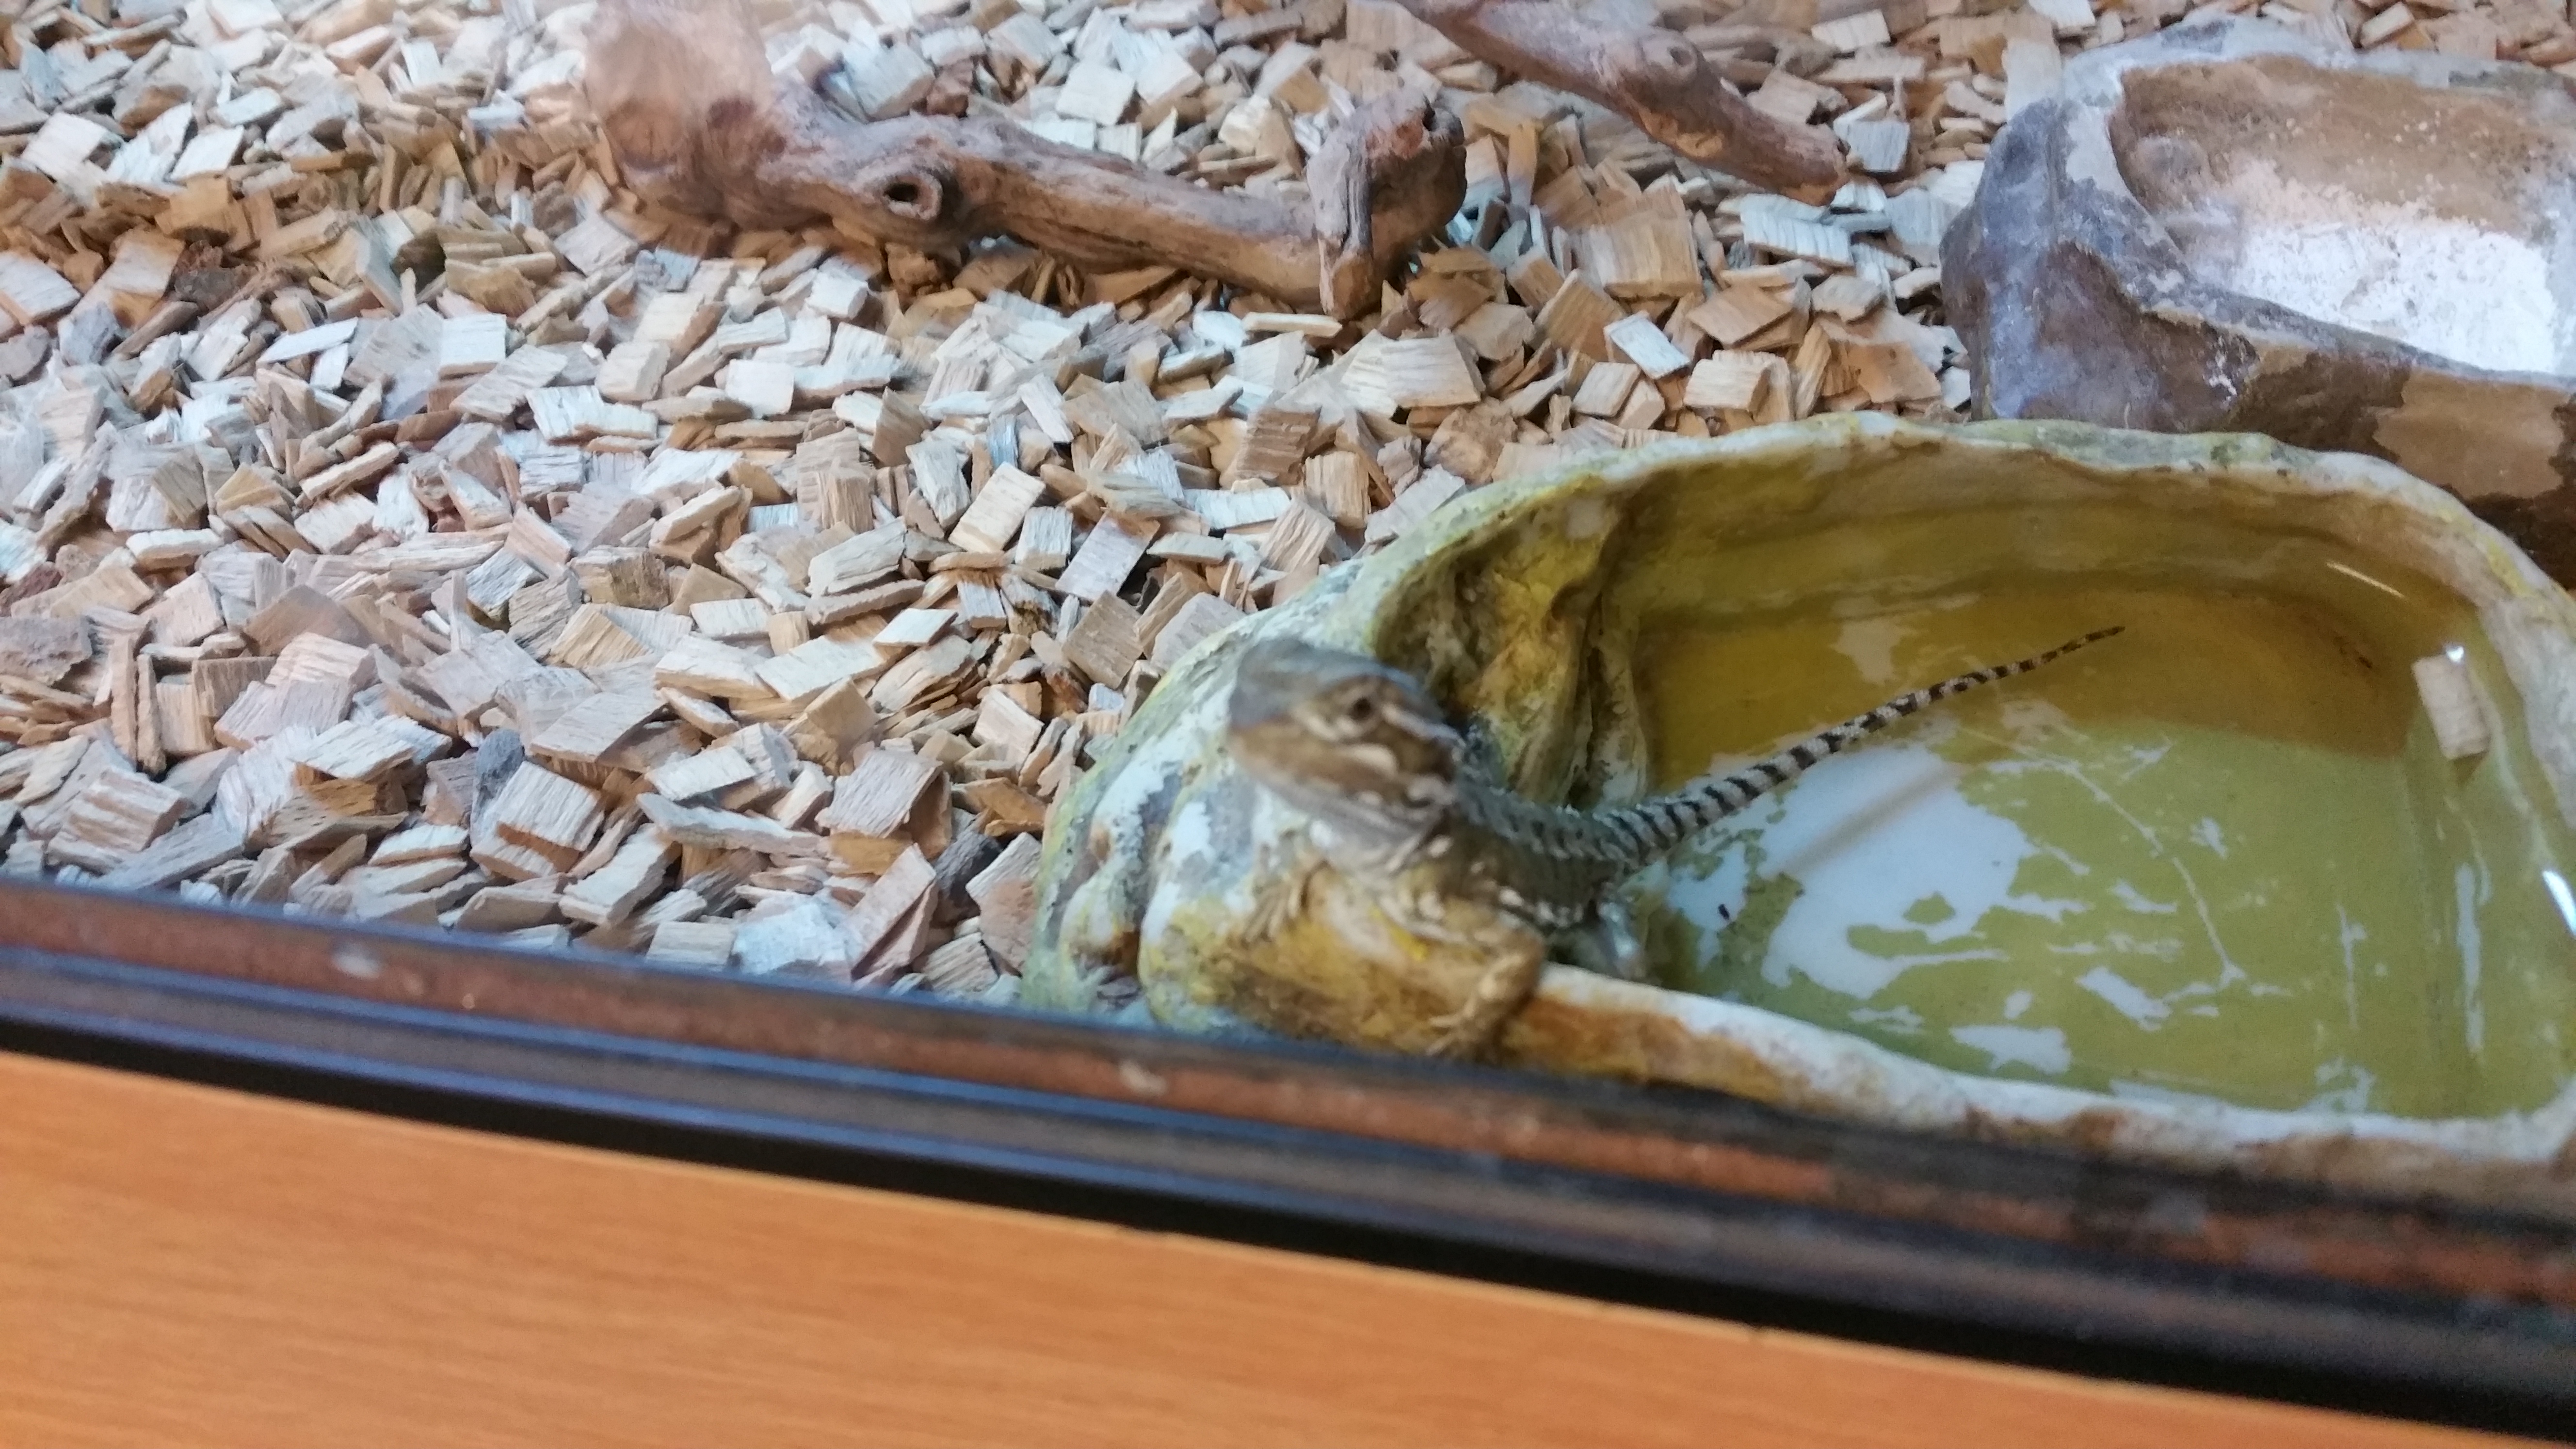
A Rankins dragon does require a water bowl, although they are rarely seen to drink (I know some individuals seem to love getting in their water bowl see the little Rankins dragon above). Do change the water regularly and keep the bowl clean. It is hot in a Rankins dragon viv. and bacteria will grow very quickly around the rim of the water. A feed dish is a good idea for the veggie component of a Rankins dragon diet, to help avoid the risk of impaction by picking up bits of substrate.

Your Rankins dragon will  love something to climb on, branches, rocks etc. Avoid anything sharp, they may suddenly jump down and you don’t want them to get injured. Anything else in there is up to you. Some people like to put in things to encourage activity and don’t mind what it looks like, so use anything they can find. Others like it to look as natural as possible. It’s really up to you but I would suggest you read a good book for the more advanced aspects of setting up a vivarium both for further advice and for ideas if, like me, you’re not that creative yourself.

Rankins dragon feeding

Your Rankins dragon is an omnivore. They eat a wide range of foods including crickets, locusts, cockroaches and various lavae, vegetables and fruit etc. In captivity they also need vitamin and calcium supplements to ensure continued good health. I feed mine to a regular regime. It is necessary for the health of the Rankins dragon and with the amount of animals I have to feed it is more convenient to stick to a plan and this gives us confidence our animals have received a varied and balanced diet. You will find your own regime that suits you. I will give you mine just to illustrate what a balanced Rankins dragon diet looks like, not to suggest this is superior to any other feeding plan for a Rankins dragon.

Day one – cricket or locusts dusted with Nutrobal vitamin supplement.

Day 2 – salad vegetables.

Day three – crickets or locusts dusted with calcium powder.

Day four – salad vegetables.

Day five – crickets or locusts dusted with calcium powder.

Day six – fruit or veg.

Day seven – crickets or locusts without any supplement.

I vary this further by changing the crickets and locusts for calci worms from time to time and very occasionally wax worms. I don’t use meal worms myself for a Rankins dragon due to the higher level of chitin in the jaws and the consequent increased risk of impaction but occasional meal worms would be OK. I must confess the type of veg I use depends very much on what is on offer at the local supermarket or my garden but favourites of my Rankins dragon are rocket salad or herb salad, grated carrot, romaine lettuce, curly kale and cucumber.  I haven’t had a lot of success with fruit with a Rankins dragon but common ones used are strawberry, mango and banana.

One way of getting veg. into a more obstinate Rankins dragon is to feed the veg. to the insects. Whatever they eat, your Rankins dragon is eating. I do this sometimes but usually I have gut loaded them on a gut load formula any way.  For a very young Rankins dragon I dust every feed to ensure the rapidly growing youngsters are getting enough calcium but I only ever use vitamin powder once a week. The risk of over dosing the Rankins dragon far outweighing the risk of under dosing when using such a balanced diet.

It is important to consider the size of the insect food. It is a bad idea to give anything longer than the distance between the eyes of your Rankins dragon. Too many over large insects will not be properly digested and you will see the half digested remains in the Rankins dragon poop, possibly along with some blood! Alternatively your Rankins dragon may regurgitate the meal, again with the risk of damage to the Rankins dragon digestive tract from the sharp bits of exoskeleton.

rankins-dragon

Things to avoid feeding a Rankins dragon are obviously anything toxic. This sounds really obvious but people have been caught out with plants. The Rankins dragon may not eat the plant but the insects probably will. The Rankins dragon will then eat the now toxic insect.The use of live plants with a Rankins dragon and with bearded dragons is becoming more popular do make sure you know what plant you have and that it is safe. Also I avoid broccoli and cabbage leaves with a Rankins dragon as these contain oxylates that can prevent calcium being available to the metabolism.

Common problems with Rankins dragon feeding include the notorius addiction to wax worms. I have seen a bearded dragon fed these exclusively. Not only is this a bad idea from a nutritional point of view but you often end up with a Rankins dragon that will only eat this one source of food and frequently only when fed by hand! However I have not yet seen the Rankins dragon that cannot be weaned back onto a balanced diet with a little perseverance.

That said, a Rankins dragon can be fussy as they get older. The basic message is that as they are omnivores, it probably doesn’t matter as long as they get a balanced diet.

A reminder about Rankins dragon UVB

UVB lamps are essential to the well being of the Rankins dragon. Unfortunately as soon as you switch one on, the level of UVB output starts to deteriorate. Over time this will drop to zero, so although the lamp is lit, it is providing no benefit at all to the Rankins dragon. The lamps should be replaced between 6 months to 1 year (depending on type and manufacturer). We always replace all our UV lamps every 9 months WITHOUT FAIL. The consequences to a Rankins dragon of not replacing the UV lighting regularly are loss of appetite and metabolic bone disease.

Kept correctly a Rankins dragon should live over 8 years and prove to be a very inquisitive, interactive and easy to handle little lizard.

The Angell Pets Team

Fire Salamander Care Sheet

Fire salamander is a name given to a group of related species of salamander of the genus Salamandra from across Europe (excluding the fringes such as Britain and Ireland) and North Africa round to the Levant. The fire salamander is a terrestrial amphibian that only really goes to water to breed, spending most of its relatively long adult life rooting around in damp leaf litter looking for prey. They rarely come out during the day (unless it has recently rained or they are breeding) and actively avoid higher temperatures by burrowing into the litter or under logs if it gets too warm. In warmer climates they become inactive during hot months and in cooler climates they do the same in colder months.

fire salamander

The fire salamander lays eggs (timing dependant on species and location) directly in to water that hatch immediately as they are deposited into the larval form, which is completely aquatic although the stage at which the larvae emerge at varies widely (some species emerge as the adult “metamorph”). Normally larvae are about an inch long and metamorphose into the adult form when they have roughly doubled in size. The adult fire salamander reaches between 5 and 12 inches in size.

Most species of fire salamander inhabit lowland forests and woodland although some species prefer higher forests and some are alpine. There are also some species of fire salamander that can inhabit quite arid regions such as the Levant.

The fire salamander has quite a large territory for such a relatively small animal and males will defend this territory during breeding season so as large an enclosure as possible is best to allow natural behaviour.

Housing

The fires salamander actively hunts its prey through the forest floor litter. A large enclosure will allow this behaviour in captivity. A minimum of 45cmx45cm for the smaller species is OK but larger is better. Glass enclosures work best due to the high humidity but wood (melamine) could be used if very well sealed (the surface as well as the edges). The fire salamander hides away during the day so lots of hiding places (logs, cork bark etc.) will be appreciated.

Substrate

The fire salamander is generally a forest animal and a substrate to mimic this works best. We use a mixture of coir, bark chips, leaf litter and moss to create a varied forest floor effect. Others use more utilitarian set ups, particularly some breeders and if the animals are breeding then hey ho, who am I to argue. I just prefer a natural looking set up for display. A completely natural set up with drainage media, bio active substrate, detrivores in the soil to dispose of waste and plants to use the nutrients produced would also work very well although I find I end up focussing more attention (and expense) trying to look after the plants than the fire salamander!

Heating

The fire salamander does not like temperatures much above 20C. Some alpine species in particular will not tolerate higher temperatures and must be kept below this. All species should be kept no higher than the low 20s with a night time drop of up to 10C. So in a modern, well insulated house it is unlikely that extra heating is going to be necessary. If you have a particularly cold house (for instance a wife that has the heating off and the window open when it’s minus 4C outside) then a small heat mat may be necessary but if this is the case a thermostat is an essential.

Lighting

The fire salamander is nocturnal. Specialist lighting is not required. A day night cycle is beneficial but in a glass vivarium natural light will provide this. Of course in a display vivarium lighting can make all the difference to the look and modern LED lighting works well here. Units that switch between white daytime lighting and blue night time lighting work well and look good. Of course if you go for a bioactive set up with real plants then you will need lighting to stimulate plant growth.

Feeding

The fire salamander actively hunts and eats invertebrates such as worms, insects, spiders etc. The key is variety. Offer a range of foods including crickets. calci worms, wax worms, meal worms etc. Gut loading the live food is always a good idea but supplement powders should not be necessary if the diet is varied. A diet of just crickets for example is bad idea and supplement powders would then be necessary. Regular misting of the enclosure to maintain humidity (they require high humidity, especially in the substrate but not “wet”) will also provide all the free water the fire salamander needs. A water dish is only necessary for breeding. If you put one in at any other time they are unlikely to use it.

For smaller or newly metamorphosed adult fire salamander smaller prey items will be more appropriate, such as fruit fly, smaller calci worms, white worms etc. For a larval fire salamander a range of aquatic foods are available such as daphnia, bloodworm, white worm etc. Most are available live or frozen.

So the fire salamander makes a fairly easy to care for, low cost animal to keep. However as with all animals remember you are taking on responsibility for its care for the rest of its life which in the case of some species of fire salamander can be up to 30 years in captivity.

Iguana Care Sheet

Iguana. The very first thing to consider when buying an iguana is its adult size. The commonest species, Iguana iguana gets very large. Females around 5 feet, males 6 to 7. Even though a lot of this is tail they are still a large and bulky lizard. Eventually they are going to need a very large enclosure (small room size) so don’t get one if you can’t accommodate this amount of space. If you are sure you can then read on.

red iguana

The next thing is longevity. 12 to 15 years is the norm, 20 years is possible in captivity. So the room you have decided to set aside for the iguana when it reaches adult size needs to remain a “spare room” for that length of time. One of the commonest things we hear is “Do you want my” boa, python, monitor lizard, even bearded dragon. “We’ve a baby on the way and we need the room now”. Things change, who knows what they are going to be doing five years from now, let alone 20. You need to factor your responsibility to your animal into your plans. If you have the space and a contingency if things should change then read on.

An adult iguana is a large animal with powerful jaws, claws and a long tail, which it can use as a very effective whip in defence. Regular short periods of handling when young, so the iguana gains confidence in its owner, will stop it getting truly aggressive but you need to be confident in yourself in handling a large animal. If you have never owned a lizard before (they are very fast as well, especially as youngsters) then think about getting something a little easier first to gain experience. OK, you’re confident you have the space, can accommodate the iguana in any changes that may occur and are sure you can handle such a large beast, what do you have to do to look after it?

Firstly source your iguana. Get a captive bred one. They are generally more docile, do better in captivity, don’t come with a full load of parasites and you will not be contributing to environmental damage. If you buy one on line or on social media from someone who just needs to “get rid” then how confident are you going to be that such an unwanted iguana has been properly looked after. Of course this is true of any animal, not just an iguana. I have seen corn snakes that have been kept in shoe boxes under the bed and just chucked a mouse every few weeks when the “owner” has remembered, bearded dragons with MBD because the UVB lamp has never been changed since they got the lizard, so called breeders who don’t even have the necessary equipment for the babies so just try to sell them off as quickly as possible so they don’t have to get any and so on and so on. Make sure you are using a reliable source, that has a premises you can visit and see the iguana as they are being kept and have the knowledge and experience to give you the advice you need and importantly, with a written  iguana livestock policy. If the seller cannot give you the information you require, don’t buy from them as they cannot have been looking after the iguana properly themselves and you could be buying a problem. If there is a problem, how likely is it you can return the iguana? We want to see you too. We don’t sell our animals on line as we feel we have a responsibility to the iguana not to be selling it to someone who cannot look after it. Buy from someone who knows and who cares.

Housing

As already discussed your are going to need a very large enclosure (up to 12’x6’x6′ for a large adult male iguana) eventually. However a baby iguana is going to look lost in such an enclosure and there are other reasons for starting out in a somewhat smaller vivarium. Firstly it is supposed that a baby iguana can sometimes find it difficult to find the food and water in a large enclosure. Certainly not the ones we have had! Also you wonder how the wild ones get on outside. I think that is maybe truer for animals that have to hunt insects. That said, why take a risk when there are other reasons to start smaller. Catching a nervous baby iguana is not easy in a large space. I am getting on now and bending down is not as easy as it once was. I had to try to catch an iguana in the shop that escaped whilst a customer was viewing it the other day and could only do it once I had in cornered in a smaller space. Much easier to catch an iguana in a smaller vivarium. Also catching them will be quicker and therefore less stressful to the iguana. You are trying to get it used to being handled and not to see you as a threat. Much better they get used to you opening the viv’ and just quickly picking them up than chasing them round a room first.

Heating

The iguana comes from tropical and sub tropical America (mainly central and south). They like it warm and humid. A basking area hot spot of up to 48C dropping to 25 and the coldest end. Heating is best achieved with lamps although some background heating may be required in a larger enclosure. Importantly there must be a temperature gradient with areas for the iguana to sit in so it can move around the enclosure to regulate its body temperature. They do better with heat coming from above. A heat mat on the floor can result in thermal blocking with any larger animal so if using a mat for overnight temperature in a smaller vivarium, have it mounted on the end wall, off the floor so the iguana cannot lay on top of it and overheat. A UVA  basking light for daytime heat and an infra red lamp or ceramic heat emitter for night time heat is ideal, although you do need to ensure the iguana cannot touch the lamp and burn. In the adult enclosure more than one lamp or heat source will be necessary. Only one may heat the animals head but it is 6 feet long so the body would not get any benefit. In other words increase the size of the basking area as the iguana grows. Keeping any animal at such high temperatures is almost impossible without some way of controlling the temperature. Ambient temperature is going to change. A heat source that achieves 45C on a cold winters night is going to be considerably hotter on a hot summers day so a thermostat is essential. Overheating will kill an iguana much quicker than it being kept too cool.

Lighting

An iguana is a diurnal lizards. They are active during the day (they have an organ under the skin on the top of their heads often called a third or parietal eye that detects light and some movement). An iguana will also require UVB lighting. This is not the light provided by the basking spot lamp (unless you use a combined heat and UVB lamp). Normal basking lamps DO NOT provided UVB light although some do provide UVA. UVB is essential for allowing the iguana to manufacture vitamin D3 in its skin. Vitamin D3 is used in the metabolism of calcium from the diet. Without a good source of UVB the iguana cannot get calcium from their food and their bodies will then start to scavenge it from the only source left which is the bones. This leads to metabolic bone disease (MBD) and can be fatal. It is even more likely in a growing iguana as the calcium demand is higher. Of course in the wild they are in full sunlight and you cannot get a better UV source than that (so taking your iguana into the garden on a hot summers day is a good thing – do make sure you don’t have toxic ornamental plants though).

One thing often overlooked is that UVB bulbs and tubes, whilst they may carry on working as a light source, stop giving out UVB after a while (depending on which type). After 6 moths UVB tubes start to deteriorate and after a year are not producing any appreciable UVB light at all. You will need to change tubes at around 9 months usage, so make sure you record when you last changed the lamp. Also UV does not travel very far from the source. Having a lamp on the top of a 6 foot high enclosure and expecting the UVB to reach an iguana on the ground is beyond wishful thinking. You will need to provide a basking area close (around 12 inches) to the UVB lamp to ensure the iguana is getting enough to manufacture vitamin D3. This is OK as iguanas are mostly arboreal and so will spend most of their time on strategically placed branches and ledges.


Substrate and decor

Substrate choice is always a subject that creates debate (or in a lot of cases out and out slanging matches). I have my own personal preferences and my own reasons for that choice and you may have yours. As I don’t know your choices and reasons I will give mine instead. Certainly for a smaller enclosure I prefer bark chips (also known as orchid bark). I like it as it looks natural and also as it can help maintain the humidity of the vivarium by retaining some moisture. There is a perceived risk of an iguana accidentally ingesting it and subsequent impaction but I have never known this and by using a large food bowl and disposing of uneaten, spilt food this can be avoided. Sometime I have mixed it with coir (coco fibres) to make it go further and sometimes added a layer of dead leaves or moss for an even more natural look, particularly when going the whole hog and setting up a naturalistic environment complete with detrivores to clean up the poop and waste food. However that’s a subject on its own so I won’t cover it further here. In a large adult iguana enclosure this can get expensive and lots of people use just newspaper. Normally I am not a fan as I don’t like the look of it and the animals cannot get a grip on the surface. However with iguanas they are not going spend enough time out of the branches for that to be a problem. I still don’t like the look though. Some people use straw or alfalfa pellets. Again not my favourite. There is little risk if ingested as, after all, it is just food. However any water spilt on it turns it to mush and it can then smell. Of course you don’t have to use anything in a large enclosure, just have a surface that is easy to wipe clean but do keep it clean!

As already stated, an iguana needs branches and ledges to climb around on (hence the need for height in their enclosure). Artificial greenery (personally, I prefer silk plants to plastic) works well and looks good. If you are going to use real plants make sure they are not toxic as the iguana will at least try to eat them. Any thing purchased from a garden centre will have been sprayed with pesticide and may also have pesticide in the soil of the pot. Go organic. Whichever you choose, the more the merrier. A young iguana especially will appreciate the hiding spots.

Food

The iguana is a vegetarian, completely. Yes in the wild they are bound to eat the odd insect or slug that is on their food but only by accident. Feeding animal protein in any amount will lead to renal problems as the kidneys are overloaded.

90% of the diet needs to be green fibrous food such as rocket, lettuces, kale, dandelions etc. The other 10% can be made up of squashes, cucumber, grated carrot etc. and small amounts of fruit (ours love a bit of mango). Go easy on the fruit though, as too much can upset the stomach which is not good for the iguana and you are the one that has to clear up the resultant mess. There are also commercially prepared iguana packaged foods available. Whilst I would not advocate feeding these exclusively to an iguana, they make a good “cupboard staple” for those times when, for whatever reason, you just can’t get out to get some fresh food. Our iguana likes tortoise pellets now and then and since these contain calcium and vitamin supplements they make a good occasional treat.

Supplementation of the food with calcium powder and occasionally vitamin powder will ensure a healthy iguana throughout its life.

Whilst small, chop the food up quite finely. They don’t really chew as such and will swallow lumps whole, so keeping the pieces small will only help. Always feed good quality food fresh. Remove any uneaten food before it goes nasty and it is an artificially hot environment, it will go nasty quickly.

Always provide fresh water daily. A bowl large enough for a youngster to get into is good. Regular misting will also help maintain humidity (which helps when shedding skin) and ensure youngsters are getting water to drink. You can adjust humidity further by moving the water bowl. At the cool end there will be less evaporation than in the hot end.

red iguana

With proper care and handling IGUANAS do make good pets. They do seem to get to recognise and interact with their owners and each has its own unique character. Unless you are very experienced though (and if you are you probably wouldn’t be bothering to read this) avoid getting an adult. If it hasn’t been properly looked after it is likely to be aggressive and such a powerful animal is going to do some damage. Always see and handle any animal first, before committing to buy. Above all appreciate you are taking over responsibility for the animal when you buy it and all that entails. If you are not sure you have the space, time and finances don’t.


The Angell Pets Team

Uromastyx Care Sheet

Uromastyx lizards make great reptiles to keep, especially for those who do not want to feed livefood. These, often colourful, lizards are in a way the vegetarian equivalent of a bearded dragon (they belong to the same family), a similar size (some are smaller and one is larger) with similar heat and light requirements (a bit hotter though) and are almost as interactive (although some individuals can be a little shy).

There are a number of different species (out of 18 in total plus sub species) of Uromastyx generally available. These all have similar environmental (check for your species on specific measurements) and food requirements.

uromastyx

North African Uromastyx (Uromastyx acanthinura nigriventris)

The natural range of the various species of uromastyx is north of the equator from north Africa round into the Indian sub continent. With the variety of sizes there is also a variety of maxium ages, with the Egyptian uromastyx generaly being the largest and longest lived. 15 years is a good average age for any uromastyx although 30 years has been reported for a captive specimen.

Housing

Uromastyx need it hot and dry. Due to the high basking heat levels you will need a larger vivarium that for similar sized bearded dragon. This is not because the uromastyx needs more space as such (although I am sure it will appreciate it) but due to the need to maintain a sufficient temperature gradient for you uromastyx to effectivley thermo regulate. In a small viv. with such a high temperature basking area you will inevitably be raising the temperature across the whole viv. and your “cool end” will not be cool enough. We would recommend from 3′ to 6′, depending on species and size of the uromastyx. Personally I would recommend a wooden viv. that will keep the heat in, with a good quality thermostat to prevent overheating. Trying to keep the temperature up in a glass viv. that looses heat readilly could cost a bit in electric and the life cost of any pet should always be taken into consideration before getting one to avoid having to pass it onto a “resue center” when it becomes too expensive to maintain.

Heating

High daytime temperatures are very important to a uromastyx. They are a diurnal lizard (active during the day) and spend nightimes in a burrow away from predators. Night time temperatures can fall quite low, 18C (in a normal house you could switch all heating off at night or have a small heat mat if your house is consistently cold at night). Day time temperatures are kept high. Ambient temperature needs to be around 38C at the hot end and around 26C at the cool end with a basking spot temperature of 48 to 60C. In trying to keep a temperature this high it is essential to have correctly sized heat equipement and a good quality thermostat to prevent overheating your uromastyx. With all uromastyx the brightness of the lighting is also important so using bright incandescent or halogen lamps for the basking area heat is best.

Lighting

As said, bright daytime lighting is essential for a uromastyx. Not only does it stimulate feeding behaviour is also brings out the best colours. Generally the uromastyx colours only really show when they have heated up in bright light. UVB is also critical to the continued good health of the uromastyx. WIthout adequate levels of UVB they cannot absorb calcium from their diet and will get seriously ill. In fact on a really hot day (30C plus) a uromastyx will love basking in a secure area outside. You cannot get a better UV source than the sun! In the vivarium use either a minimum of a 10% UVB fluorescent tube (which will need to be changed at least every 9 months) or a combined heat and UVB mercury vapour or metal hallide basking lamp (these cannot be regulated by a thermostat so size correctly).

Decor

It is a good idea to ensure there are multiple levels (use rocks or ledges) so not only can the uromastyx find a wider variation in temperatures but also so it can bask nearer to the UVB source (not too close if using a combined heat and UV source, it must not be able to touch it). UV light does not travel very far from the light source and the strength of the UVB rays deteriorates rapidly with distance. A deep substrate will provide burrowing media but hides placed around the viv. are a good supplement/alternative. Make sure any rocks cannot fall and crush your uromastyx and that hides are placed throughout the enclosure so the uromastyx can lay up at night and get out of the high temperatures during the day in a temperature needed at that point.

Substrate

A deep substrate that can hold itself together and provide a burrowing medium is a good idea. We tend to use Lucky Reptile desert bedding as it can hold a bit of humidity at lower levels, so best replicates the wild environment. It also looks the part! I would avoid pure silica sand (play sand) as there is a higher risk of impaction and I don’t like calci sand myself for the same reason. Others do use these substrates and claim to have had no problems but I would rather avoid the risk. You can also use more utilitarian substrates but they do not have the structure to form burrows or localised humidity.

Feeding

In the wild, Uromastyx eat vegetable matter. In extremis they will eat insects but this is only done when vegetable matter is unavailable (drought conditions) and no alternative is available. The animal protein is thought to cause harm to the internal organs (especially the kidneys). In captivity vegetable matter is obviously always available so insects should not be given. A variety is best for your uromastyx. Green leaves such as rocket, unsprayed dandelion etc. are good for uromastyx. Avoid brassicas – cabbages etc. as these contain oxylates that bind up dietary calcium, making it unavailable to the uromastyx metabolism. Squashes, carrots etc (finely chopped or grated) can also be given and proprietary brands of herbivore food (usually sold for iguanas, tortoises etc.) make a good store room standby. Dusting food with a little calcium powder daily is a good idea but restrict vitamin powders to weekly as it is possible to overdose vitamins. If you are giving plenty of variation of fresh foods to your uromastyx additional vitamins will not be necessary more that once a week. If feeding a balanced, fresh diet a uromastyx will rarely drink water (some highland and coastal species may). You may wish to present a water dish once a week but do not leave it in the vivarium for too long (an hour is adequate) as with the high heat levels it will quickly evaporate and raise the humidity. This is harmless in the short term but leaving a water bowl in the vivarium all the time can be detrimental to the health of the lizard (consistently high humidity will make it susceptible to respiratory infection). I don’t bother with a water bowl.

All the Uromastyx we have had have been docile. I have never been bitten or even tail whipped by one although anything with a jaw could bite I suppose. Consequently they make great “pets” although they should not be kept out of the vivarium for too long ( a couple of hours is fine) as they do need the high temperature and UV levels.

The Angell Pets Team

Ackie Monitors (Varanus acanthurus) Care Sheet

Ackie monitors (or spiny tailed monitors) make a good first monitor lizard or a step up from the more commonly kept agamid lizards such as bearded dragons.

Akie monitor (spiny tailed monitor) Varanus acanthurus

Like bearded dragons, Ackies are from the dryer regions of Australia and need similar (but not the same) conditions. They get a little larger (well longer at least) and so will need a large enclosure. They should also be quite active, making a larger enclosure essential.

Due to their relatively small size (for monitors) and generally good temperment, Ackies make a good starter monitor but are attractive enough to appeal to more experienced keepers too.

Enclosure

Akies get to around 2 feet in length (males slightly larger). They are a very active lizard and like to burrow in the substrate. This, coupled to the fact that they like it very hot in the basking area (50-60 degrees centigrade) means that they need a large vivarium. Large enough that a good temperature gradient can be maintained (50 degrees hot end 20-25 degrees “cold” end) and that the substrate can be deep enough to remain moist under the surface.

As large an enclosure as possible is desirable but a minimum of 4’x2’x2′. Some people recommend larger to ensure the correct depth of substrate but by using stones to form a retaining wall you can acheive the necessary depth in a vivarium of this size.

Make sure that when being assembled the edges of the vivarium are well sealed. The idea is to have moist soil in the viv and if care is not taken to seal all the edges and joins the vivarium will not last long. Better still use glass, although these are more expensive. Plastic will work well, I just don’t like them myself.

Ackies will make their own burrows but then they are not accessible. Providing a hide will encourage it to stay where you can find it. Providing plenty of hides throughout the enclosure will give the lizard a choice of where to hide when maintaing body temperature so the more the merrier.

A large water bowl is good idea.  Placed correctly, overfilling the bowl can help keep the lower levels of substrate moist and the Ackie will certainly relish going in the bowl. Ours burrow under the bowl, which is at the cooler end of the viv. I assume this creates a cooler hide and ours move between this and their “favourite” rock hide during the day

Heating

Ackies like it HOT. My preferred way to create a very hot basking area is with a combination of ceramic heat emmitter (on all the time) and basking lamp (on during the day). In very large vivs you can use a combined heat and UV lamp. These are not dimmable but if the viv is big enough and the lamp sized correctly, as they like it so hot, you can get away with it. You will still need another form of heat for overnight when the lamp is off. If in any doubt, go for a combinination of heat emmiter and basking lamp with a pulse proportional stat on the emmitter. This will give you control day and night.

Lighting

Ackies need high intensity UV. If you have a large viv. and have gone for a combined heat and UV basking lamp then job done. If not, you will need as large a wattage 10% or 12% UVB tube as you can fit in the viv. Fitting a reflector to the tube will greatly increase the amount of UV recieved by the lizard. UVB is essential for calcium metabolism (manufacture of vitamin D3 in the skin) so is not an “optional” requirement.

UVB tubes stop giving out noticeable levels of UV after around 9 months (the combined heat and UV lamps a little longer), so ensure you budget to replace these. Unless you have an expensive UV monitor you will not notice the difference but your lizard will and if the tube is not replaced will eventually get metabolic bone disease and probably die a painful death. If you cannot afford the replacement tubes, don’t get an Ackie.

Basking lamps and UVB lamps should be switched off overnight to give a good day/night cycle. Leaving lighting on all night can stress diurnal animals (and is a waste of electricity and will speed up the replacement of your UVB lamps!). Also, by having a dark rest period they tend to be more acitve during the limited (around 12 hours) daylight hours.

Substrate

Ackies like to dig. They will dig hunting for food, they will dig out burrows to rest in, they will dig to lay eggs, sometimes they will just dig! Therefor the substrate needs to be as deep as you can make it. As already alluded to, you can make a retaining wall with rocks to create an area with deeper substrate. In the wild they like to move around rocky outcrops and drop into gaps when threatened so putting in plenty of areas to climb and hide is a good idea. They will dig out a burrow to hide in and this needs to be at a higher humidity than the surrounding air. To maintain this, regular dampening or misting of the substrate is required to stop it drying out. If it is too shallow, not only will it not support a burrow, it will dry out too quickly. That said the word is damp, not wet!

A good soil, sand mix works well. I like to use desert bedding. It has a good structure that retains moisture at lower levels and can suport burrows without collapse. Other types of soil are also suitable. Mixing in some coir helps moisture retention but I don’t like Ackies on pure coir (has to be too wet to support a burrow)

Feeding

Like other monitors, Ackies are carnivores. The bulk of their diet should be insects but they will take pinkes and fuzzies etc. (although weaned rodents contain more calcium and less fat), as well as a little egg and turkey (I don’t bother with turkey myself) . Don’t use dog and cat food – some people do but it is never a good idea.  Ackies store fat in the base of their tails. Feeding to much meat (i.e. food they don’t have to actively hunt) can lead to obesity, although they are nowhere near as prone to this as say, a Bosc Monitor. Better to encourage them to run around hunting by feeding live insects. I use gut loaded cockroaches in the main but vary this as much as possible. We sell livefood so I always have a wide range avaiable so I am a bit spoilt for choice. Dust the food with calcium a few times a week(every day when young) and vitamin powder once a week. Gut loading the insects prior to feeding is the best way to ensure a balanced diet.

Breeding

I am not going to go into detail about breeding. Female Ackies are cyclical breeders. They build up fat stores in their tails and when a certain level is reached and conditions are right, they start to produce eggs. When ready they produce a pheramone that stimulates the male into mating behaviour. Fertilzed eggs are then laid in a burrow. As with most lizards, if the eggs are removed to an incubator for hatching they must not be turned and must be kept in their original orientation or the embryo will die.

Should I get one?

Ackies are great lizards to keep. Most will become quite tame (our male is very tame, the female less so, although she can be handled). They do need large enclosures and the right equipment, regularly maintained. They are probably not for someone who has never owned a reptile before but make a good step up from the usual beaded dragons and leopard geckos etc. Remember they are quite long lived, 15 – 20 years so if considering these fascinating little monitor lizards you need to understand the comittment you are undertaking before buying. They are quite hardy if kept under the right conditions but it is always wise to find out where your nearest specialist reptile vet is located before you need to use one. Normal vets will not have a clue with most reptiles.

The Angell Pets Team

Chile rose tarantula care sheet.

Chilean rose tarantula: (Grammostola rosea, Grammostola porterii)

Chilean rose taratulas are a medium sized tarantula (body 7.5cm, leg span 15cm) from southern Peru and northern Chile, on the edges of the Atacama dessert. This docile spider ranges in colour from grey, through pink to a vibrant copper red. Females are thought to live from about 20 to 40 years. As with most tarantulas, males live shorter lives, sometimes due to their expiring a few months after maturation, often through becoming a post coital snack for the female. Males have smaller bodies and longer legs. Females remain pretty much in or around their burrows throughout their lives, whereas males roam around when adult, looking for a female. Although a burrowing spider in the wild, captive Chilean rose tarantulas rarely construct viable burrows, although they do appreciate somewhere dark to hide. In captivity they feed almost entirely on crickets and other insects (from which they derive most of their water) although larger spiders will eat the occasional small mouse.

Chile rose tarantula

Adult Chilean roses require an arid environment. They appear to despise damp substrate and should never be misted. However very young spiderlings do require some humidity. Their substrate must be regularly dampened or they will quickly desiccate and die. This is thought to be due to the exoskeleton taking time to “toughen” and become waterproof. As they age the substrate can be allowed to become progressively dryer. As they grow a suitably sized water bowl can be introduced. Too big and the young spider will fall in and drown. Adults, whilst liking it dry, do require a water dish for occasional drinking.

Chilean rose tarantulas are probably one of the easiest tarantulas to handle because they are fairly slow moving and rarely bite, giving plenty of warning first. If they do bite it is usually a dry bite (no venom injected) and in the extremely rare cases where venom has been injected it has proved to be the equivalent of a bee sting.

HOWEVER people can be allergic to bee stings and you would not know if you were allergic to a spider bite until after you had been bitten. And who wants those big fangs stuck in them anyway? As with most new world tarantulas the biggest risk is from urticating setae (the hairs). These either brush off the spider when handled or are rubbed off on cage appointments or by the spider itself. They penetrate the skin causing irritation, which can be quite severe in rare cases. Getting these hairs in the eyes requires hospital treatment. So NEVER rub your eyes after handling a tarantula or anything it has been in contact with and as with all animals ALWAYS wash your hands after handling.

The biggest risk when handling any tarantula is to the spider itself. Any fall of more than a couple of inches is potentially fatal. They are delicate creatures and can rupture internally and externally. A lost limb may well heal and eventually regrow but a ruptured body, whilst sometimes treatable, is more often fatal. Even a regrown limb can cause the spider problems with later moults. All in all it is best NOT to handle tarantulas, you don’t get any irritation or bites and they stay alive.

The Chile rose is probably the hardiest species in the hobby as well. The environment they come from is dry, very hot during periods of the day and very cold during periods of the night. The can tolerate quite wide ranging temperatures in the short term. Generally the normal household temperatures in the UK are sufficient for a Chile rose and no additional heating is required. Obviously if you keep the spider in an unheated room throughout the winter a heat mat would be required.

For spiderlings we use coir as a substrate. It can retain some moisture for raised humidity and is light weight so will not bury delicate spiderlings. For larger individuals and adults I prefer to use a more natural looking substrate, something like Lucky Reptile red clay sand bedding or desert Bedding and construct a more natural looking terrarium. That is only my preference however, you may prefer something a bit more utilitarian and that’s fine. The only thing I would point out is that if the substrate is too damp the spider will spend all of its time on the side of the enclosure to keep of it.

For hides you can use whatever you like from broken plant pots to fancy resin hides, it’s up to you, the spider just wants a dark hole to hide in. I would avoid anything too heavy and unstable though, you don’t want it to crush the spider if the enclosure gets knocked.

Chile rose tarantulas are notorious for stopping feeding as adults. They are reputed to have not fed for up to two years, although the longest I have experienced is just over 6 months. This can worry less experienced owners a bit. If you have an adult female and she looks in good condition I wouldn’t worry if she stops feeding for a while. If you have a youngster and it stops feeding it is probably getting ready to moult.

We feed all our spiders weekly. If the following week there are stiil insects in the pot we remove them and stop feeding. Generally the spider will moult within two weeks. With larger spiders you can see the new skin growing through exposed areas of the old skin (it goes darker), however this is not obvious on smaller spiderlings and keeping track of the feeding habits is a must. Do not leave crickets in with the spider whilst it is moulting. Often the spider will delay the moult in the presence of crickets etc. and when it finally does begin the process the crickets have an easily accessible meal whilst it is incapacitated. Following a moult the spider will remain soft and vulnerable for quite a while, so don’t feed for at least a week.

As with all our animals our Chilean rose tarantulas are captive bred, normally in this country and are not taken from the wild population. There are lots of reasons for this but the two most important to us are wild animals are likely to have parasites and/or infections and we have no control over how they are harvested. It could have been done responsibly, a controlled amount of individuals taken from an area that is then left to recover before more are taken or as is often the case, a businessman could have paid locals peanuts to collect as many as possible in a short period of time leading to the critical reduction in numbers of a species in a locality that may never recover. Always buy captive bred animals, they are generally more expensive but worth it.

Balkan Green Lizard Care Sheet

Balkan green lizards (Lacerta trilineata) are part of a group of related species ranging across Europe and western Asia. The eastern lizards of this grouping are slightly larger than their western cousins and a bit bolder too. This aside, care is very similar for all species. Balkans have a reputation of being less damp tolerant than some of the other species such as Lacerta viridis.

balkan green lizard

Housing

We would not recommend keeping more than one of these lizards in an enclosure. Males will fight and females, whilst more tolerant, may do so as well unless the enclosure is quite large. Keeping a male and female together outside of breeding may also risk injury or stress to the smaller female as well, if she cannot get away from him.They have been kept together succesfully in a suitably large enclosures by experienced breeders but why take the risk? This care sheet is aimed at the beginner/intermediate keeper and does not cover keeping large breeding colonies which require very large enclosures (up to 20m2 in some cases. Green lizards can be kept outside through the summer but I am not covering that here. Needless to say cage security is a big issue with keeping them outside).

We would recommend a wooden (or glass) vivarium of around 30″ – 36″ x 18″ x 18″. You can use a smaller 15″ cross section but I just find that restricts the view and reduces the lay out a bit. I do like naturalistic, display vivs so tend toward larger vivs for display purposes.

Substrate

A variety of substrates can be used. Some people have used sand – I don’t. The risk of impaction is higher and whilst easier to seive I find it will smell dirty, quicker than other substrates. Beech chips are fine but I find them a bit utilitarian for my taste. Orchid bark chips work well (if you are worried about swallowing of bark pieces then use a coarser grade). There are several newer products coming along all the time that work really well. I like Pro Reps Tortoise life substrate for these lizards. I place some at one end of the viv and blend into orchid bark for the other two thirds, banking this up over a piece of cork bark which acts as a hide and as structure for the layout. Damp moss under the hide will produce a more humid microclimate that helps with shedding. The additional depth of orchid bark acts as an anchor for upright fake plants (Exo Terra and Komodo’s Boston Ferns for example). A few well placed rocks (I use Red Jasper) improve the look further and help keep everything in place. the Torrtoise Life encourages natural digging behaviour. You could use something like Tortoise Life (a clean, pathogen free “soil” type substrate) across the whole viv. Green lizards like to dig and burrow so make sure it has some depth to it (5cm is OK).

Lighting

Green lizards are diurnal so require UVB lighting. A 5- 6% tube or compact UVB lamp will be sufficient to ensure production of vitamin D3 and so uptake of calcium from the diet. This will avoid metabolic bone disease and some other nasties that these li\zards would otherwise be prone to.

They will also benefit from a basking spot lamp. We use one that produces some UVA light as this helps promote a natural circadian rhythm. Don’t have one that is too powerful for the size of your vivarium and ensure that the lizard cannot come into contact with the lamp (a guard may be necessary to ensure this). Incadescent lamps produce a lot of heat as well as light so (especially in a wooden vivarium that helps keep heat in) a method of ensuring that the lamp does not overheat the viv is essential. This normally means a dimming thermostat.

Heating

In addition to a basking spot lamp we use a heat mat to provide background and overnight heat although in a hot summer this can be switched off. The basking spot (on during the day) should not exceed 40C at the hottest point (a rock directly under the lamp would be good) and the cool end of the viv wants to be around  20C during most of the year. The lizards will benefit from a lowering of temperature during the winter however. If you are looking to breed this is essential to stimulate breeding behaviour in the spring. when the temperature increases again. Overnight the temperature will drop with the basking lamp switched off. This is not only acceptable but desirable to reproduce natural conditions. Around 20C at the hottest point overnight would be good. Maintaining a gradient across the viv to allow thermo regulation during the day is the key.

A thermometer is an essential piece of kit. A basic dial type is sufficient. I don’t use these. Not because they don’t work, they do but because I have a lot of vivs and that’s a lot of thermometers, I prefer to use an infra red “point and press” thermometer. More expensive if you only have one viv but cheaper if you have lots. Much more accurate too as you can take surface temperature readings at any point across the temperature gradient (hot side to cool side). If you don’t have one of these then two dial termometers, one at each end will do. Just remember that the temperature on the back wall of your viv will be less than that directly under the basking lamp so a reading of 30C is sufficient. Adjust whatever thermostat you are using to the reading you get from your thermometer and don’t worry too much about what the termostat setting says, worry about what temperature you are actually acheiving.

If using a heat mat I would, in this case, place it on the wall of the viv rather than the bottom. The substrate will be too deep and will insulate the heat mat, possibly to the point of creating a dangerously hot spot if a fault develops in the mat. If you wish to use a ceramic heat emitter instead of heat mats that would be fine but again make sure the lizard cannot touch it – they get very hot to touch.

Feeding

Green lizards are insectivores. We use a wide variety of cultivated insects. Crickets form the mainstay. They are very active and encourage natural hunting behaviour. We vary these with locusts, some morio and mealworms and occasional waxworms and fruit beetle grubs (the smallest ones we can find). Dust the insects with calcium and occasionally with vitamin powder containing D3 (We do this once a week) . Since we feed our insects throughout the week to keep them alive on our shelves for our customers, ours are gut loaded anyway so we do not have to worry about that. Just remember, whatever you feed your insects you are feeding to your lizard in the insect’s gut so you can supplement your lizard’s diet that way.

Do not use insects captured from the garden. They could carry parasites or diseases, could have been feeding on a neighbours plants that have been sprayed with something etc. I know people do it and do not have problems. However my response to this is my mother in law smokes 20 cigarettes a day and is in her eighties and in good health, However I wouldn’t recommend it to your children. Enough said.

A water dish is obviously essential. Occasionally a lizard will use it to bathe in as well as to drink. Make sure the water is changed regularly as in the warm environment bacteria will grow very quickly and these lizards do occasionally use the water bowl as a toilet!

Handling

Green lizards are fast and can be defensive. Handling is not always easy. If you lack confidence then use a glove until you gain some. It is harder to hold the lizard with a glove on but easier to catch it in the first place so I wouild recommend removing the glove once caught. Holding the lizard across its shoulders with the first two fingers and under its chest with the thumb means is cannot get away and cannot bite. Always grab the lizard near its head when catching it and NEVER grab its tail. Like a lot of lizards (although no where near all) they display caudal autonomy – the ability to “drop” the tail. This is a defence against predators. Whilst the predator (or you) are stood looking at the still wriggling tail the lizard has hot footed it to safety. Whilst in green lizards the tail does grow back it never grows back looking as good as the original and losing its tail in this way is stressful to the lizard and to you!

Disease

Green lizards can all suffer from an highly infectious disease called viral papillomata which can appear as a black growth on the skin or in the mouth. It is always fatal, although it can take years to develop. This is really a disease of wild populations and a lizard obtained from disease free captive stock will not get this condition unless intorduced to diseased individuals. My first reptiles were a pair of European Green lizards (Lacerta viridis). I obtained them seperately. The second one had the disease and subsequently both died of it. This was however, “Ahem,” over 40 years ago  so both would have been wild caught individuals and these days, thanks to improvements in care, restrictons in capturing and moving wild animals and excellent breeders any you find for sale are likely to be disease and parasite free, captive bred lizards.


Cleaning

Spot clean daily – take out any poop you can see with a bit of tissue. If you do this daily and are thourough, you should only have to replace the substrate every three months or so. If you do not do this regualry then the vivarium will start to smell quite quickly and the substrate will need replacing more regularly.

After removing the substrate disinfect the vivarium with a good quality reptile disifectant. As we have a wide variety of animals (reptiles, mammals, birds) we are currently using F10 as it is safe for everything we stock (obviously not fish!!!) but there are others avaiable. Do not use household disinfectants. Many contain toxic phenols (the distinctive TCP smell you get in some famous household disinfectants).

As already mentioned, clean the water bowl regularly (daily is best but at least every two days). This should be disinfected each time as this is likely to prove the dirtiest part of the set up (everything will collect there, lizard poop, drowned crickets, bits of shed skin, bacterial scum etc).

It shouldn’t really need saying but I will say it anyway – always wash your hands after handling your lizard or anything inside the vivarium. Reptiles can carry E.coli and salmonella bacteria and you really do not want a dose of salmonella. In the weak it can be fatal but even in healthy individuals it is embarrasingly unpleasant, incredibly painful and debilitaiting. Don’t take risks, get some anti bacterial hand cleaner.


The Angell Pets Team


Angell Pet care sheets page

Angell Pet give advice on all aspects of the animals we sell and on others we don’t. In addidtion tyo the advice given to prospective pet owners we have a page devoted to care sheets on this site which is constantly being up dated and expanded.

angell pet care sheet page

Just click on the Angell Pet Caresheet tab for a page of sheets and articles on mammals, birds, reptiles, invertebrates, fish and additional sheets on hygiene, handling and treatments.

The care information for each animal will also be added to the description on our Angell Pet webstore over the next few months.

We also have additional advice on our Angell Pet You Tube channel.

The Angell Pet Team

Pet shop Gloucester care sheet – goldfish

Pet shop Gloucester advice series, how to look after goldfish

Goldfish are generally  rated as one of the easiest fish to keep. However there are basic requirements for all fish that must be provided for the fish to remain healthy. Goldfish come in a wide variety of colours and shapes. Whilst most are capable of being mixed as they have similar water quality requirements, not all should be mixed. Mixing normal or comet types with fancy fantails for instance can result in the fins of the fancy fish being attacked. Fancies and fantails with thier long flowing fins and tails tend to be slower moving than the “normal” types and cannot get away from boisterous tank mates.

pet shop gloucester goldfish

A fish tank is a sealed system. With the exception of perhaps oxygen and carbon dioxide, which can enter and leave the system at the surface of the water, anything you put into the tank stays in the tank and nothing can get in unless you put it in. Put food in and you have added energy and nitrogenous waste (from the protein in the food). So the fish will grow (and so may plants) and the waste will build up. In a natural system such as a river or lake, this waste is washed away and broken down (recycled and reused by other organisms). In a tank it cannot go anywhere and you have to establish and maintain the natural waste disposal mechanisms to deal with it.

Solid waste will build up in the gravel or sand and in the filter. Left alone a sludge would eventually build up and begin to rot, releasing toxic volatile organic compounds (VOCs). To prevent this is easy. Simply stir up the gravel at each partial water change (more on that later) or better still, buy a gravel cleaner that cleans the gravel as you remove water for the water change. Every second water change rinse the filter element in the water you have taken out to remove the solids. Do not rinse under the tap. This will kill all your lovely beneficial bacteria and you don’t want that. Some filters also contain carbon. This does become saturated and will need replacing periodically. The same is true if there is a nitrate removal sponge. Leaving this in for too long will seriously effect water quality.

Dissolved nitrogenous waste is released into the water by the fish in the form of ammonia. Ammonia is highly toxic to fish so it has to be removed. Bacteria that eat the ammonia live on the surface of the gravel and in the filter medium. They break it down into nitrite, which is less toxic and then into nitrate (much less toxic). Nitrate is plant fertiliser. If you do not remove this then your tank will suffer from excessive algae growth. For this reason and those already given you should carry out a partial water change (remove some of the water and replace it with fresh, i.e. treated if using tap water) every couple of weeks as a minimum. How frequently you need do this depends on a number of factors, size of tank, size of filter, number of fish, presence of plants etc. but for an established, reasonable sized, not overstocked tank every couple of weeks should be sufficient.

Having an efficient filter (internal or external) will significantly improve the quality of the water (and reduce frequency of partial water changes to a degree) and improve oxygen and carbon dioxide exchange rates at the surface of the water (by the rippling effect of the outlet of the filter). We do not sell goldfish bowls or recommend tanks without some form of filtration. It is possible to do without but it significantly increases the amount cleaning and water changes you will need to do and with the best will in the world people let it slip. In the end the fish suffers so we choose not to sell them.

pet shop gloucester external filter

There are three main ways of adding filtration. Under gravel, using an air pump to drive water down through the gravel and up and over a tube, internal cartridge or element, probably the commonest form in small tanks and external cartridge or element,  more usual in larger tanks. All work well and have their own benefits and drawbacks which we will not go into here. Any can be used with goldfish.

Before putting goldfish into a new tank it needs time to mature. A week is normally sufficient. This is to allow the natural systems to establish before being presented with waste to dispose of. The process of maturation can be accelerated by the addition of the necessary bacteria in a liquid form. Fish should then be added gradually over a period of weeks to enable the bacterial cultures to grow with the increased waste load.

Pet shop gloucester safewater

Plants make an attractive addition to the tank and can also help use up nitrogenous waste but they are not essential. Fish do like to hide among them and eat some kinds but artificial plants can be used. Ornaments are at your discretion, they can provide hideaways for nervous new fish but again are not essential.

Lighting is also not essential but does bring out the colours of the fish. If using real plants then the lighting is needed to encourage plant growth. Leaving the light on for too long can stimulate algal growth on the glass, gravel and any ornaments and plants though.

We wouldn’t recommend less than a 25 litre tank for goldfish. With regard to the number of fish there is no hard and fast rule but generally it is the surface area of the tank that dictates how many fish it can hold, rather than just the volume of water (larger surface area = higher oxygen exchange rate) so a shallower wide tank will hold more than a  deep narrow tank.

pet shop gloucester aqua 40

Goldfish are omnivores and eat a variety of food stuff. A good flake or pellet food is normally sufficient to provide all the necessary nutrients.

Goldfish are quite hardy. All goldfish are fish farm bred nowadays and can tolerate a wide range of waters. Tap water in this region is medium to medium hard and pH (a measure of the hydrogen ion content of the water) is well buffered (resistant to change)at around 7.4 – 7.6. This is suitable for all modern goldfish and further treatment for pH and hardness is not normally required. Note that if water quality is not made a priority and the tank is not regularly cleaned pH can rise to high levels and effect the health of the fish over time. As long as you do not neglect your routine water changes this will not happen. However chlorine and chloramines are present in the water to keep it safe for us to drink and these need to be remove before being used with fish. Standing tap water for 24 hours will remove the free chlorine but will not remove the chloramines. You must use a chemical (Tapsafe, Aquasafe, Safeguard etc.) to remove these toxic chemicals (toxic to the fish – not you) BEFORE using the water.

pet shop gloucester safeguard

Avoid using real rocks unless purchased for the purpose from a reputable aquarist shop. Some rocks will significantly change the water quality to the detriment of the fish (limestone for example). Fake rocks are resin based and will not effect water quality.

After you have bought your tank, set it up, let it mature for at least a week, you can add your fish. Don’t add more than one or two at a time. Check the fish in the shop for any obvious signs of disease such as a swollen body, damaged eyes or fins, sores, excreta stuck to the fish in a long line etc. The shop should carry out these basic checks in front of you and tick off each element of the inspection. When you get home, put the bag with the fish in into your tank (remember to remove some water first or you will have an overspill!) and leave it for about 15 minutes. This is for the temperature in the bag to equalize with that of the tank to avoid temperature shocking the fish (which can be fatal). Then remove the fish from the bag and put it in the tank. Do not bother to try to “acclimatise” the fish to the water chemistry by  making holes in the bag etc.. It takes many days for this to happen and is just not practicable.

Feed your fish daily. The food should be gone in 1 – 2 minutes maximum. Any longer and you are overfeeding your fish and this will eventually lead to problems. Check the fish daily for signs of disease. Carryout your water changes and filter cleaning and you should have a healthy fish for many years to come.

Pop into our pet shop Gloucester for more specific advice on goldfish.

Pet Shop Gloucester Advice Series Hamster Care Sheet

Pet shop Gloucester advice on caring for your Syrian hamster.

Hamsters generally make good family pets. However there are issues that you need to take into consideration.

They are nocturnal so being more active in the evening allows the busy family time to enjoy them. However in a child’s bedroom this can be a problem, unless you buy a silent wheel and a cage that does not have bars for the hamster to constantly chew on. They are small mammals ideal for families with limited space. Hamsters make a suitable pet for children providing they are taught the responsibilities of their pets daily cleaning, feeding, handling and care.

Syrian or Golden hamsters originally come from Syria. In the wild they live in burrows in the day to keep cool, so they love tubes and tunnels. They are active animals and travel great distances at night, hence the need for a wheel. They will carry food in pouches and hoard it, so check yours is eating what you put in for it or when you clean it out you will be wasting food by throwing away its food store. Syrian hamsters are solitary animals and best kept alone. You will see them together in the shop but this is because they are young, sexually immature animals. When they reach sexual maturity they will start to fight. Syrian hamsters have more than twenty colours and coat types such as smooth coat, satin and long haired. Syrian hamsters average life span is 2 -3 years.

Hamsters normally stay healthy throughout their lives. They can suffer from coughs and sneezes and their nose and eyes may run, so keep them warm and away from any draughts. If the signs persist seek veterinary advice. Hamsters can suffer acute diarrhoea known as wet tail . If this occurs take your pet to the vets immediately. There is normally no problem with hamsters’ teeth. However if they do not meet properly they will grow too long and eating will be impossible. If this occurs the teeth must be clipped regularly. It is therefor essential the teeth are checked BEFORE you buy. Also make sure your hamster has something to gnaw on to keep its teeth worn down.

Syrian hamsters do not need to hibernate but will appear to do so if there is a sudden drop in temperature below 5°C. They will go torpid and their breathing will be so shallow they appear dead. Sadly hamsters have been disposed of in the past because the owners thought they had died. Hamsters will also exhibit this behaviour if the temperature becomes too high (35C)

If your hamster escapes from its cage try putting a box (its nest box) or bowl in the corner of the room. He may well be in it the next morning. If you are concerned about your hamster’s health speak to your pet shop Gloucester or your vet.

 Feeding

pet shop Gloucester

Use a good proprietary brand of hamster food. This will have the correct balance of nutrients. Hamsters in the wild eat a mixture of seeds, plants and insects. Make sure you feed yours a similar balanced diet. If your mix does not contain insects (many do not) then supplement with meal worms. We use live but if you are squeamish you can used dried (both available at your pet shop Gloucester). You can also feed some fruit and millet etc. or hamster fruity treats but you will not need too many of these. Be aware that hamster store food. They will cram as much into their cheek pouches as possible and store it in a “larder” (designated part of their burrow) for later. Just because the bowl is empty does not mean it has no food. Check the cage for the store and monitor that.

Sexing

Sexing hamsters is very easy. The testes in the male are clearly visible under the base of the short tail from a very early age. Also the distance between the anus and the genitals is much greater in the male. In our pet shop Gloucester we tend to keep males as they will tolerate each other for a lot longer than the females. Females need to be separated earlier but males will eventually fight. In the wild the fights will result in one hamster losing and running away. In the confines of a cage there is nowhere to go and so the fights will result in the death of one (at least) of the hamsters.

Housing

A good sized cage is required. You can use either a wire cage with a plastic bottom, or a plastic covered cage. Both have disadvantages and advantages. Whilst hamsters love tunnels, I would avoid cages with horizontal tubes as part of the construction. Hamsters naturally use a latrine (another designated part of their burrow) and you can almost guarantee it will select the most inaccessible part of the tubing system and the wee will leak out of the tiny air holes in the plastic (this is from experience!). Buy tubes to go inside a normal cage, they are easier to clean. Due to this habit of using a latrine it is possible to litter train a hamster. Buy a hamster toilet and put some of the soiled bedding in it and soon the hamster will be using this as its latrine, saving on cleaning out the whole cage. Definitely get a hamster wheel or saucer. Hamsters love to exercise. Not having one is really unfair on the animal.

pet shop Gloucester

When cleaning cages and accessories make sure you use a small animal disinfectant not household which are toxic. A very useful piece of equipment is the hamster ball. Not only is this excellent for exercising the hamster but it is useful to use it whilst you clean out the cage.Two birds with one stone.

If you need further advice on hamsters call into our pet shop Gloucester and have a chat.


The Angell Pets Team